Skip to content
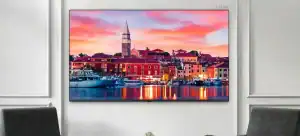
Choosing an LED display isn’t about chasing the biggest numbers. It’s about how refresh rate, static contrast, and colour accuracy work together — and how processing, scan rate, and on‑site conditions change what “good” looks like. This guide gives AV professionals and integrators a clear, camera‑safe framework for evaluating LED visual performance.
This guide is for professionals, system integrators, and technical decision‑makers who need studio‑ready or client‑facing LED that looks flawless to the eye and to cameras.
What are the three pillars of LED visual performance
- Flicker‑free motion (Refresh rate)
- Lifelike depth (Static contrast)
- True‑to‑life colour (Gamut, bit depth, calibration)
These pillars interact. Prioritise them by application (broadcast, virtual production, retail, corporate, outdoor), then validate with camera tests and environment‑specific checks.
Pillar 1 — Refresh rate & camera compatibility: achieving flicker‑free motion
What it is: Refresh rate (Hz) is how often the LED canvas redraws per second. It is not the same as source frame rate (fps).
Why cameras care: Modern CMOS sensors read line‑by‑line. If the LED refresh cycle and the camera shutter are out of sync, you’ll see banding or rolling black bars — a deal‑breaker in broadcast, virtual production (VP), and live streaming.
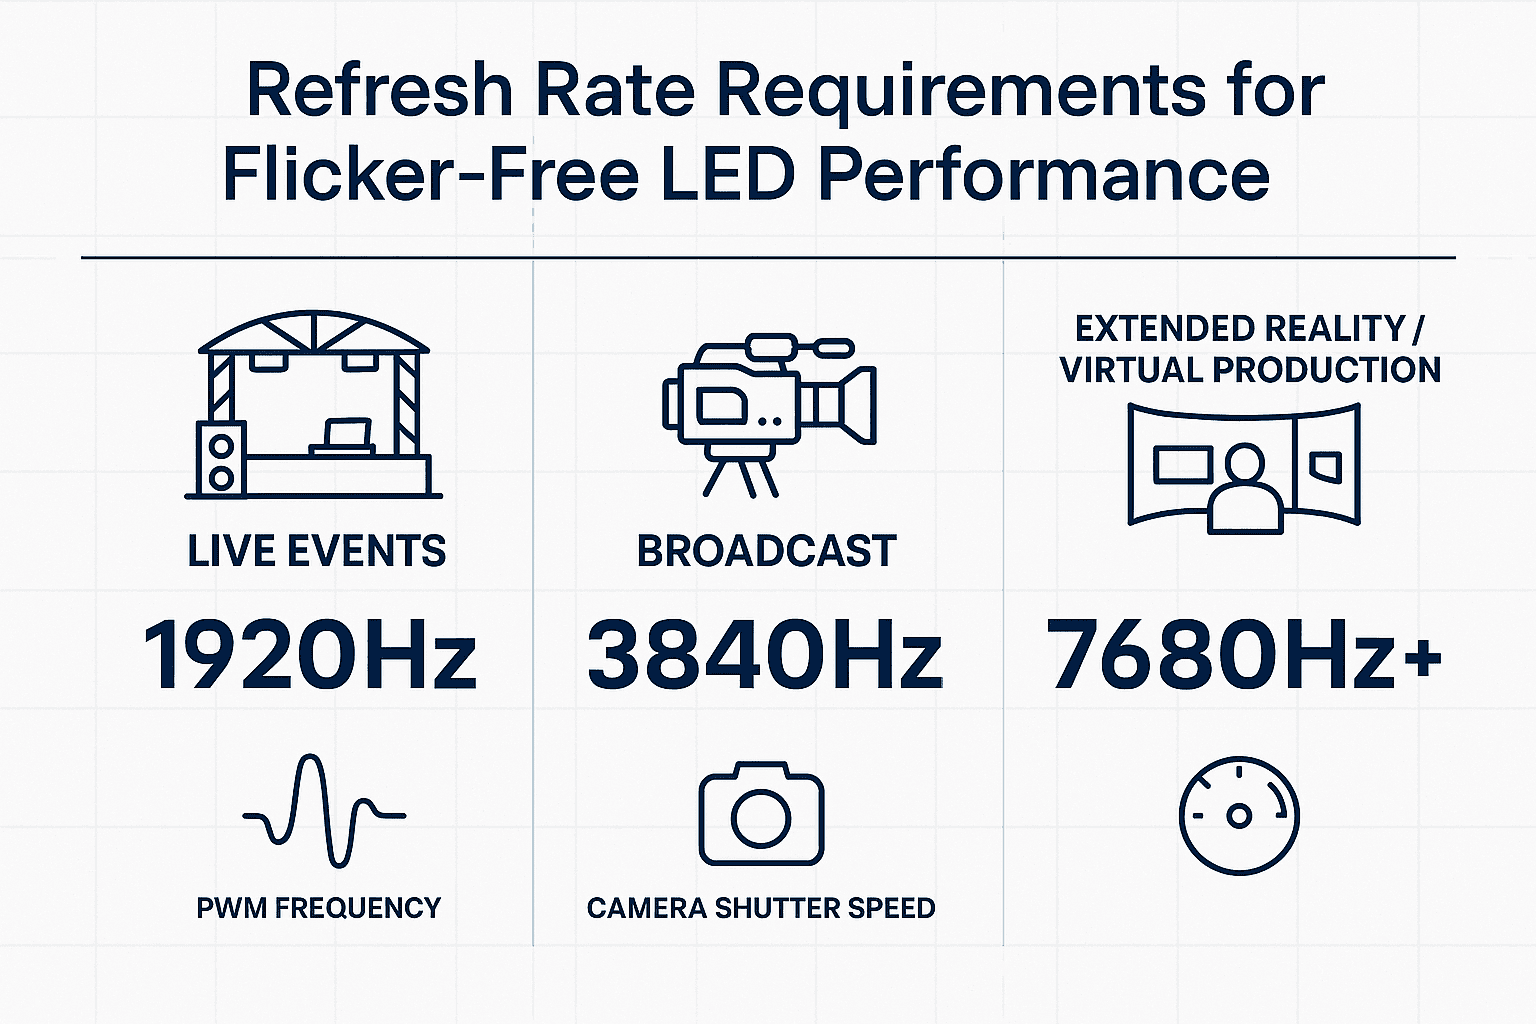
Recommended refresh rate by application
Guidance for AV use cases. Bars are scaled against a 7,680 Hz reference (100%).
Always validate at your operational brightness and with the actual cameras on site.
Hidden variables that matter: use an LED processor that supports genlock and adaptive frame‑rate / frame remapping to align the LED’s timing with camera or source. Examples include systems from Brompton and NovaStar. For Brompton, ShutterSync® lets you tune refresh to shutter; Frame Remapping supports multi‑camera workflows.
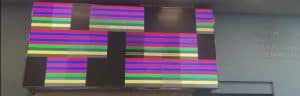
Pillar 2 — Static contrast: depth, readability, and “pop”
What it is: Static contrast is the ratio of a white pixel to a black (off) pixel measured at the same time. It drives perceived depth, clarity, and legibility — especially under ambient light. Dynamic contrast is content‑adaptive and not a reliable indicator of real‑world performance.
What drives high static contrast: deep blacks via low‑reflectance surfaces and encapsulants (e.g., GOB), smart mechanical design (louvres/micro‑louvres), and installation angles that minimise reflections.
Outdoor note: you don’t always need extreme nits outdoors if contrast is higher and reflections are suppressed. Validate at local noon.
Decision matrix — what to prioritise by use case
Darker labels indicate higher priority for that scenario. Use alongside on-site camera tests.
| Primary use case | Priority 1 | Priority 2 | Priority 3 | Processor notes |
|---|---|---|---|---|
| Broadcast / live streaming | Refresh | Colour | Contrast | Use genlock and adaptive frame-rate; test at programme brightness. |
| Virtual production / XR | Refresh | Colour | Moiré control | Genlock, shutter alignment; verify low-nit stability; lens/stop tests. |
| Flagship retail | Contrast | Colour | Refresh | Low-reflectance surfaces; calibrate to brand palette at run brightness. |
| Corporate lobby | Contrast | Colour | Refresh | Consider direct wall-mount (see DX Series). |
| Outdoor DOOH | Contrast | Brightness (as needed) | Colour stability | Louvres/anti-reflective treatments; validate at local noon. |
Contrast can reduce how much brightness you need outdoors. Prioritise readability over peak nits.
Pillar 3 — Colour accuracy & depth: realism and brand fidelity
Colour gamut: coverage of standard spaces such as Rec.709 (broadcast) and DCI‑P3 (cinema). Wider gamut enables richer colours.
Bit depth: 8‑bit ≈ 16.7M colours; 10‑bit ≈ 1.07B colours with smoother gradients and fewer banding artefacts.
ΔE (Delta E): perceptual colour error. Values below ~2 are typically imperceptible. See CIE guidance on chromaticity/colour difference metrics (e.g., CIE 1976 UCS ΔE).
Bit depth — why 10-bit helps gradients
Conceptual illustration: 10-bit delivers smoother tonal steps and fewer visible bands than 8-bit.
Pair higher bit depth with proper calibration (ΔE targets) for consistent, neutral greys.
Processor‑assisted colour: On Brompton systems, PureTone helps neutralise greyscale colour casts by correcting non‑linear RGB responses, while Dark Magic improves perceived image quality at low brightness. Validate these features at your target nit level and viewing distance.
- LED processor features: look for genlock, adaptive frame‑rate / frame remapping, fine‑grained gamma, and per‑colour gain controls. Brompton and NovaStar both offer professional ecosystems. For Brompton: ShutterSync® and Frame Remapping.
- Live grading (NovaStar × Pomfort): Pomfort Livegrade Studio integrates with NovaStar MX/COEX so you can control the processor’s 3D LUT in real time to match foreground/flesh tones in‑camera. See NovaStar’s note on MX/COEX and 3D LUT support here, setup docs here, and COEX wiki here.
- Scan ratio & PWM: a panel’s multiplex scan (e.g., 1/8, 1/16) interacts with PWM to determine low‑brightness smoothness and camera‑visible artefacts. Test at the dimmest level you’ll actually run.
- Receiver cards & mapping: consistent receiver/firmware versions and a clean cabinet map aid uniformity and serviceability.
Tip: test at operational brightness (often 100–400 nits indoors) rather than showroom maximums; low‑brightness is where banding and quantisation usually appear.
Refresh rate requirements for flicker-free LED performance
Different applications demand different refresh rates for stable, camera-safe LED performance.
On‑site validation protocol (15 minutes per wall)
- Set target brightness (not max).
- Genlock / frame‑rate: align to source or camera reference.
- Camera test: pan a calibrated chart; check for banding and band movement.
- Gradient sweep: 0–100% greyscale at 10‑bit; inspect for posterisation.
- Black level: kill room lights; check uniformity/clouding.
- Brand swatches / skin tones: compare with reference under house lighting.
- Low‑brightness pass: drop to operational nit level and repeat checks.
How to run a camera test on an LED wall (beginner‑friendly)
Goal: Prove the wall is camera‑safe at the brightness, frame rate and shutter you’ll actually use — and fix issues (banding, flicker, moiré, colour mismatch) before sign‑off.
Tools you’ll need — explained simply
- Genlock (house sync): timing reference that keeps cameras and the LED processor in step so the camera doesn’t “catch” the wall mid‑refresh (common cause of banding). In IP workflows this is usually PTP per SMPTE ST 2059‑2; in SDI it’s often tri‑level sync from a sync generator. Your processor UI should show “locked”. More on PTP for broadcast from EBU here.
- Greyscale ramp (preferably 10‑bit): a smooth black‑to‑white gradient used to spot posterisation (steppy bands) and check neutral greys (no green/magenta tint).
- Zone plate pattern: concentric rings that stress all spatial frequencies to reveal aliasing/resampling artefacts; useful for moiré checks.
- Siemens star: radial “spokes” chart for focus/resolution checks; also useful for moiré as you change focus and aperture.
- Brand swatches (e.g., Pantone): your brand colours in a standardised system so sign‑off isn’t subjective.
- Colour chart (e.g., Calibrite/X‑Rite ColorChecker 24‑patch): industry‑standard patches for skin tones, primaries and neutrals.
- Optional (processor features): Brompton PureTone (neutralise greyscale casts), Dark Magic (improve low‑brightness rendering), ShutterSync® (align refresh to shutter); and Pomfort Livegrade Studio with NovaStar MX/COEX for live 3D LUT/CDL trims.
Set‑up
- Match project frame rate.
- Engage genlock. Lock the LED processor to house sync (PTP ST 2059‑2 or tri‑level). Keep it on for all tests.
- Choose a sensible starting shutter. Begin around a 180° shutter (≈ 1/(2 × frame rate)); adjust as needed.
- Set real operating brightness. Use the actual nit level you’ll run in production; many issues only show at lower brightness.
-
Flicker & banding
Show 50% grey; pan/tilt. If bands appear: confirm genlock, nudge phase; with Brompton, try ShutterSync®.
-
Low-brightness stability
Dim to the lowest planned level; repeat Pass 1. On Brompton, enable Dark Magic if you see low-nit artefacts.
-
Gradients & greyscale
Play a 10-bit greyscale ramp. If you see steps or colour tints, confirm an end-to-end 10-bit path and consider PureTone.
-
Moiré & resolution
Show a zone plate and Siemens star. Adjust focus/aperture/distance to find your safe window.
-
Colour & look
Frame a ColorChecker and brand swatches; match to a calibrated monitor. With NovaStar MX/COEX, trim via Pomfort Livegrade (3D LUT/CDL) and save the preset.
Camera test — five quick passes
Run at your project frame rate, chosen shutter (~180° start), and real operating brightness.
Pass/fail cues
- No visible bands at your chosen shutter/frame rate and run brightness.
- Smooth gradients (no posterisation) and neutral greys.
- Controlled moiré within the planned focus/aperture/distance.
- Brand colours and skin tones look right in‑camera (checked against ColorChecker and Pantone references).
From the field — Daniel Reynolds, Managing Director (Dynamo LED Displays)
At a recent music video we were filming, the wall looked perfect to the eye but showed faint rolling bands at a common 1/50 shutter. We moved the system to 3,840 Hz, enabled genlock on the processor, and re‑tested at the client’s programme brightness. Banding disappeared across all camera angles.
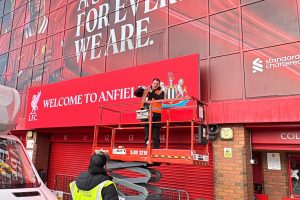
For a luxury showroom install (similar to our work for Sotheby’s International Realty in London), we prioritised static contrast and colour calibration over headline brightness. Using low‑reflectance surfaces and calibrating to the retailer’s brand palette, we achieved “pop” without pushing nits. For direct wall‑mount scenarios, DX Series cabinets have been effective where a simple wall structure is provided.
Procurement & design notes (Dynamo specifics)
- Control systems: Dynamo works extensively with NovaStar control systems across purchase and rental deployments.
- Mounting efficiency: DX Series cabinets can mount directly to a wall when a simple structure is provided, saving time and cost in some interiors.
- Outdoor fine pitch: DRX Series outdoor tiles available in 0.9–3.9 mm pitches for premium façades and urban environments.
- Warranty & service: Standard 3‑year return‑to‑base warranty; optional service contracts with 24–48‑hour response on request.
References (standards & feature documentation)
- SMPTE ST 2059 (PTP timing for broadcast) — overview from SMPTE: link; EBU primer on PTP: link.
- ITU‑R BT.709 — official recommendation page: link.
- Digital Cinema Initiatives — Digital Cinema System Specification (DCI‑P3): link.
- CIE chromaticity/ΔE background — CIE technical note (UCS, chromaticity difference): link.
- SID/ICDM — Information Display Measurements Standard (IDMS): link.
- Brompton Technology — PureTone, Dark Magic, ShutterSync®, Frame Remapping.
- Pomfort × NovaStar — Livegrade Studio overview link; NovaStar integration news link; setup guide link.
Frequently Asked Questions
What refresh rate do I need for filming LED displays?
For broadcast or streaming, start at 3,840 Hz and use a processor with genlock to reduce banding. For virtual production volumes, 7,680 Hz is a safer target. Always validate at operational brightness with the actual cameras.
Is dynamic contrast a useful spec?
Not really. Static contrast, measured simultaneously for black and white pixels, reflects real‑world performance. Dynamic contrast is content‑adaptive and often misleading.
Do outdoor displays always need the highest brightness?
No. Higher static contrast and anti‑reflective treatments can reduce the brightness required for legibility. Verify on site under peak ambient conditions.
What is scan rate and why does it matter?
Scan rate is the panel’s multiplexing ratio (e.g., 1/8, 1/16). Together with PWM frequency, it affects low‑brightness stability and camera‑visible flicker. Assess at the dimmest level you plan to run.
What colour standards should I ask for?
At minimum, confirm Rec.709 coverage for broadcast and target DCI‑P3 where cinema‑grade colour is required. Specify 10‑bit processing and calibration with Delta E targets.
Can processors fix flicker?
They help. Features like genlock and adaptive frame‑rate / frame remapping align LED timing to your source or camera. Always validate with real cameras and lighting.
Which control systems do you use?
Dynamo works extensively with NovaStar control systems. We also integrate alongside other industry processors such as Brompton where specified. Brompton PureTone and Dark Magic can aid greyscale neutrality and low‑brightness image quality respectively.
Have a project with tight visual requirements? Speak to Dynamo’s engineering team. Phone: +44 (0)203 489 9878 ·
London HQ: 146a Brick Lane, London, E1 6RU · Oxfordshire Office: Rowan House, Long Toll, RG8 0RR.